
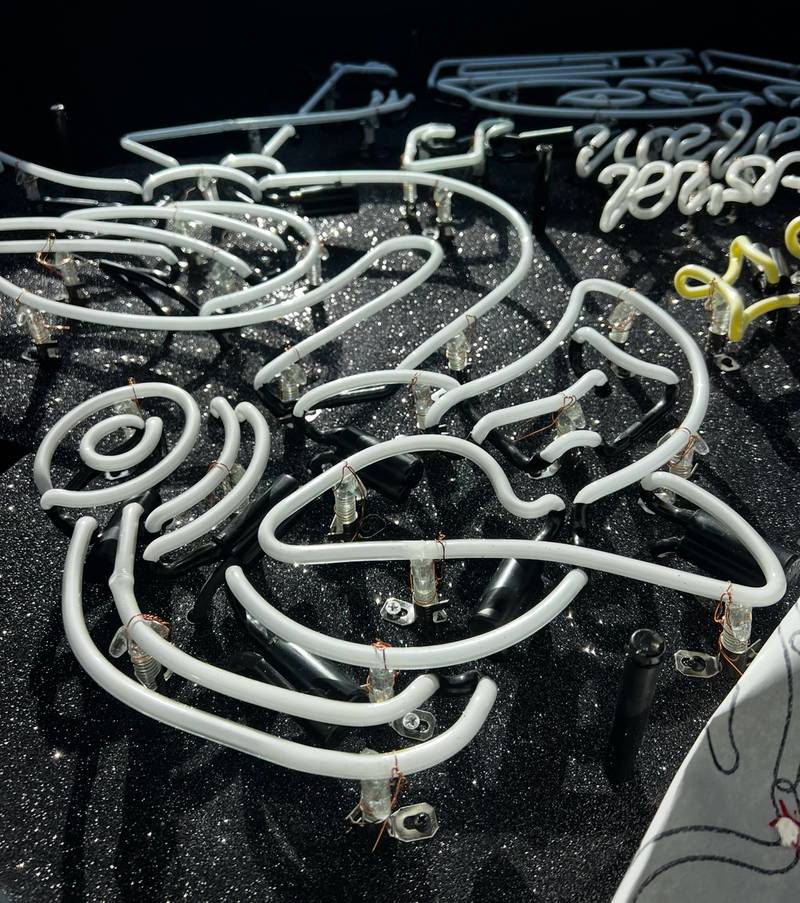
How to Fix a Neon Sign: A Fabricator's Honest Guide
In summary: Most neon sign problems fall into four categories - transformer failure, gas leak, broken glass, or loose connections. Start with the symptom checklist below to diagnose before touching anything. Some fixes are genuinely DIY-able; others require a professional with gas-handling equipment. This guide tells you which is which.
People ask me all the time what actually goes into fixing a broken neon sign. They've got a sign that's dead, or flickering, or making a noise that's driving them crazy, and they want to know whether they can handle it themselves or whether they need to call someone. The honest answer is: it depends entirely on what's wrong. Knowing how to fix a neon sign starts with knowing what broke it in the first place - and that's where most people skip a step.
I've been bending and repairing glass neon in Los Angeles for years. When a sign comes into my bench, the first thing I do is run through the same diagnostic logic every time. This guide walks you through that same process.
Note: please proceed all steps here with caution & when in doubt please let an expert handle it. These repairs do have some danger!
The 4 Things That Break Neon Signs (and How to Tell Which One You Have)
Every neon sign repair I've ever done traces back to one of four root causes. Once you know which one you're dealing with, the path forward becomes a lot clearer.
1. Transformer failure. The transformer is the heart of the sign - it steps up your standard 120V supply to the high voltage (anywhere from 2,000 to 15,000V) that the gas inside the tube needs to ionize and glow. When it fails, the sign goes completely dead, hums loudly, or trips the breaker. This is the single most common failure point on any neon sign, especially units that have been running continuously for years. Transformers are also the most DIY-accessible repair on this list, which is why I cover the replacement process in detail below.
2. Gas leak. Neon tubes are sealed glass vessels filled with noble gas - typically neon (which glows red-orange) or argon with a trace of mercury (which glows blue-white). When a tube develops a micro-fracture or a failed electrode seal, the gas slowly escapes. The symptom is one section of the sign going dim, discolored, or changing color. An argon leak often shows as a fading blue-white glow; a neon gas leak causes the familiar orange to fade toward a dull pink or go dark entirely. Gas leaks cannot be fixed at home. Re-pumping a tube requires a vacuum pump system capable of reaching below 1 millitorr, a gas manifold, and a bombarder - equipment that costs thousands of dollars and takes years to learn to use safely.
3. Broken glass tube. Neon glass is surprisingly durable, but a hard knock, a falling object, or a thermal stress crack will do it. You'll usually see a visible dark spot, a hairline crack, or a section that simply won't light no matter what you do. Sometimes a glass bender can splice and re-seal a break; more often, the tube section needs to be remade from scratch. Either way, this is a job for a professional tube bender with a ribbon burner and the experience to match the original bend.
4. Loose or corroded electrode connections. The electrodes are the metal end caps welded onto each end of the glass tube, where the high-voltage GTO wire connects. Over time - especially in outdoor signs exposed to moisture - these connections corrode, loosen, or develop arcing. The result is a sign that flickers, starts and then dies, or has one section that won't light even though the transformer tests fine. This is often the most DIY-friendly fix on the list, and I'll walk through it below.
Symptom Checklist: Diagnose Your Sign Before You Touch It
Before you open anything up or replace any parts, run through this checklist. Neon signs carry high voltage - up to 15,000V on the secondary side - so diagnosing first and touching second is not optional. Always unplug the sign before handling any internal components.
Is the sign completely dead - no glow, no sound? → Start with the transformer. Check that the outlet has power, then check the transformer's built-in fuse or breaker. If those are fine, the transformer itself has likely failed.
Is one section dim, discolored, or a different color than it used to be? → Probable gas leak. Don't try to fix this yourself. The tube needs to be re-pumped by a professional.
Is the neon sign flickering - starting, dying, starting again? → Check electrode connections first (see the section below). If connections are clean and tight, the transformer may be failing or the tube has a gas pressure issue.
Is there a buzzing sound? → A low hum is completely normal in electromagnetic neon transformers - that's just the ballast doing its job. A loud, persistent buzz or a buzz that's getting worse over time points to transformer trouble. A neon sign buzzing loudly is a sign the transformer is working harder than it should.
Is there a dark spot or visible crack in the glass tube? → Broken glass. Don't attempt to re-energize the sign. A cracked tube can arc, and in the worst case, shatter. Get it to a glass bender.
Did the sign trip your breaker? → This almost always means the transformer has failed to a short-circuit condition. Replace the transformer before resetting the breaker repeatedly.
What You Can Fix Yourself (and What You Can't)
I'll be straight with you - most neon sign repairs are not DIY jobs. The high-voltage secondary circuit in a neon sign is not like household wiring. We're talking about open-circuit voltages that can reach 15,000V, and the GTO wire (Gas Tube Only wire - the high-voltage cable connecting the transformer to the electrodes) is specifically rated for this environment. That said, there are a few things a careful, electrically-comfortable person can handle.
DIY-able:
Replacing the transformer - if you're comfortable with basic electrical work, can read a label, and follow the safety steps below. This is the most common repair and the one most worth attempting yourself.
Tightening or cleaning loose electrode connections - a visual inspection and careful cleaning can resolve a lot of flickering issues.
Replacing a blown fuse on the transformer - many neon transformers have a replaceable fuse on the primary side. Check the transformer label for the correct rating before replacing it.
Not DIY - call a professional:
Gas leaks - no exceptions. Re-pumping requires a vacuum system, gas manifold, and bombarder. This is not something you improvise with hardware-store parts.
Broken glass tubes - requires a glass bender with a ribbon burner, tube-bending experience, and the ability to match the original bend to a paper pattern. Wrong handling on a vintage sign destroys irreplaceable glass.
Any repair on a vintage or antique sign - older signs often use ceramic or glass electrode housings instead of modern rubber boots, and the engineering is specific. Incorrect repairs degrade both the electrical safety and the historical integrity of the sign.
Large commercial installations - beyond the technical complexity, there's a safety liability question. Signs installed on building facades or in high-traffic areas should be serviced by a licensed professional.
How to Replace a Neon Sign Transformer (Step-by-Step)
This is the repair I see people attempt most often, and when it's done correctly, it works. When a sign comes into my bench with a dead transformer, this is the process I follow - adapted here for someone working at home with basic tools.
Step 1: Safety first - unplug the sign and wait. Unplug the sign from the wall. Then wait at least five minutes before opening the housing. Neon transformers contain capacitors that hold a charge after power is removed, and you don't want to find that out the hard way. Work in a dry area, away from water.
Step 2: Identify your transformer specs. Before you order a replacement, read the label on the existing transformer. You need three numbers: the input voltage (almost always 120V in the US), the output (secondary) voltage (common values are 3,000V, 6,000V, 9,000V, 12,000V, or 15,000V), and the milliamp rating (typically 20mA, 30mA, or 60mA). The replacement must match all three. Mismatching the mA rating - even with the correct voltage - will either overload or underload the tube circuit, causing early failure. The IAEI's guidance on neon transformer installation covers proper loading in detail.
Step 3: Source the right replacement. Electromagnetic (magnetic core) transformers are the preferred replacement for vintage or large scale commercial glass neon - they're more durable than solid-state electronic power supplies (although these are much lighter and for that reason do have their advantage) for this application. Match the voltage and mA rating exactly. Also check the GTO wire gauge: the wire connecting the transformer to the electrodes must be rated for the secondary voltage. If the existing GTO wire is old or shows any cracking or charring, replace it at the same time.
Step 4: Photograph the existing wiring before disconnecting anything. Seriously - take a photo. The primary connections (the 120V input side) and secondary connections (the high-voltage output side) need to go back in the same configuration. Many transformers are polarity-sensitive on the primary side, and getting this wrong can trip the secondary ground-fault protection built into the unit.
Step 5: Disconnect and remove the old transformer. With the sign still unplugged, disconnect the primary leads first, then the secondary GTO leads. Note how the transformer is mounted - most are bolted to a shelf or bracket inside the sign cabinet. Remove the mounting hardware and pull the old unit out.
Step 6: Install and connect the new transformer. Mount the new transformer in the same position. Reconnect the secondary GTO leads first, then the primary leads. Keep secondary conductors at least 1.5 inches from all other objects and from the primary wiring - this is a NEC requirement (Article 600) and it matters for both safety and performance.
Step 7: Test. Plug the sign back in. If the tubes light up cleanly and the sign runs without tripping the breaker or making an unusual noise, you're done. If the sign still doesn't work after a confirmed good transformer, the problem is in the tube - not the transformer - and it's time to call a professional.
How to Check Electrode Connections
Loose or corroded electrode connections are the second most common cause of a neon sign not working properly - specifically flickering or intermittent lighting. I've seen signs come in that looked like they needed a full re-pump, and all they needed was a connection cleaned up.
The electrodes are the small metal end caps welded to each end of the glass tube. A spring-loaded housing (ceramic or glass on vintage signs, rubber boot on modern ones) holds the GTO wire in contact with the electrode. When that contact corrodes or loosens, the circuit becomes intermittent.
How to check:
Unplug the sign. Wait five minutes.
Visually inspect each electrode housing. Look for green or white corrosion, any sign of arcing (dark scorch marks around the housing), or a wire that's visibly loose or pulled back from the electrode.
On signs with accessible rubber boot connections, you can carefully remove the boot and inspect the contact point directly.
How to clean corroded connections:
Use fine steel wool or a small wire brush to clean the electrode tip and the contact point on the GTO wire.
Reconnect firmly, making sure the spring inside the housing is seating properly against the electrode.
Do not use any liquid contact cleaner near the glass tube - thermal shock can crack the glass.
When a connection is beyond cleaning:
If the electrode housing itself is cracked, the spring is broken, or the electrode shows signs of arcing damage, the housing needs to be replaced. On modern signs with rubber boots, this is a straightforward swap. On vintage signs with ceramic or glass housings, replacement requires a professional - the wrong housing type or a poorly fitted replacement can compromise both the electrical safety and the integrity of the original sign design.
When to Call a Neon Sign Repair Professional
Here's where I'll tell you to call someone like me. There's no shame in it - these are the situations where DIY stops saving you money and starts costing you more.
Call a professional when:
You have a gas leak. One dim or discolored section, a tube that glows the wrong color, or a section that simply won't reach full brightness - these are gas symptoms. Re-pumping requires a complete professional setup: vacuum pump system, gas manifold, bombarder, and the knowledge to process the tube correctly before re-filling.
You have broken glass. Especially on a vintage sign. A glass bender needs to trace the original pattern, bend matching tubing, process it, and re-install it. There's no shortcut.
The sign is over 10 years old with unknown history. You don't know what's been repaired before, what gauge GTO wire is in there, or whether the transformer was ever correctly matched to the tube load. A professional diagnosis is worth the flat fee.
It's a large commercial installation. Safety liability on a sign mounted to a building facade or in a public space is not something to take lightly.
You replaced the transformer and the sign still doesn't work. The problem is in the tube circuit - gas, glass, or GTO wiring - and you need diagnostic equipment to find it.
A professional repair typically involves: a bench diagnosis (visual inspection, transformer test, tube isolation), a gas test to confirm whether re-pumping is needed, re-pumping or glass replacement as required, and an aging test - running the sign for a period on the bench to confirm it's stable before it goes back on the wall. That last step is the one most people don't know about, and it's the difference between a repair that lasts and one that fails again in three months.
How Much Does Neon Sign Repair Cost?
These are Los Angeles-market estimates as of 2026. Prices vary by region, sign complexity, and shop. Use them as a planning baseline, not a quote.
Transformer replacement: $150–$350, depending on transformer size and access difficulty.
Electrode connection repair: Most of these occurrences I recommend the following below for service.
Gas re-pumping (one tube section): $100-$150. More sections, more cost.
Full tube replacement (one section): $300–$800+, depending on the complexity of the bend and whether the glass needs to be custom-sourced.
Vintage sign restoration: $500–$2,000+, depending on the scope of work, the condition of the cabinet, and whether original-style hardware is required.
Diagnosis fee: Most shops charge a flat $50–$100 diagnosis fee, which typically applies toward the repair if you proceed. Always get a diagnosis before authorizing work - a good shop won't skip this step.
The International Sign Association's UL 48 standard page is worth knowing about if you're dealing with a commercial sign - UL 48 governs electric sign safety, and any replacement components should be listed under UL 2161 (neon transformers and power supplies).
FAQ
Can you fix a neon sign yourself?
Some repairs, yes. Replacing a failed transformer or cleaning a corroded electrode connection are genuinely DIY-able if you're comfortable with basic electrical work and follow proper safety steps (unplug, wait for capacitors to discharge, match specs exactly). Gas leaks, broken glass tubes, and anything involving vintage signs are not DIY repairs - they require professional equipment and training that can't be improvised.
How do I know if my neon sign transformer is bad?
The clearest signs are: the sign is completely dead despite having power at the outlet, the transformer is making a loud buzzing sound, or it's tripping your circuit breaker. You can confirm a bad transformer by disconnecting the secondary GTO leads and running a short-circuit test with a milliammeter - a 30mA transformer should read 27–33mA. If it reads outside that range or reads zero, it's failed and needs to be replaced.
Why is my neon sign flickering?
Flickering almost always points to one of two things: a loose or corroded electrode connection, or a transformer that's beginning to fail. Start by inspecting the electrode connections - clean and reseat them if there's any corrosion. If the connections are solid and the flickering continues, test the transformer output. A tube with declining gas pressure can also cause flickering, but that's usually accompanied by dimming or color change.
Why is my neon sign buzzing?
A low hum from an electromagnetic neon transformer is completely normal - it's the nature of the ballast. What's not normal is a loud, worsening buzz, especially if it's accompanied by heat from the transformer housing. That level of neon sign buzzing typically means the transformer is overloaded, underloaded, or failing. Loose conduit connectors or poor metal-to-metal contact in the sign cabinet can also cause buzzing, and sometimes simply tightening the hardware resolves it.
How long does neon sign repair take?
A transformer swap can be done same-day if you have the right replacement on hand. Electrode cleaning is an hour of bench time. Gas re-pumping typically takes one to three days - the tube needs to be processed, pumped, filled, and then aged on the bench before it goes back in the sign. Full tube replacement, especially for a complex custom bend, can take one to two weeks depending on the shop's workload and whether specialty glass needs to be sourced.
Is it worth repairing an old neon sign?
Almost always, yes - especially for vintage signs. Glass neon is a hand-made, durable medium that can last decades with proper maintenance. A well-restored vintage sign has cultural, aesthetic, and commercial value that a replacement LED product simply can't replicate. The San Francisco Neon "Saving Neon" guide, produced by neon historians and preservation specialists, makes the case clearly: neon glass tubes last far longer than plastic LED alternatives, and restoration preserves both the sign's function and its history. Get a professional diagnosis first - you may find the repair is more straightforward than you expected.
Useful Sources
IAEI Magazine - Installing and Inspecting Neon Transformers - Detailed NEC-based guidance on transformer installation, loading, grounding, and bonding from the International Association of Electrical Inspectors.
International Sign Association - UL 48 Standard for Electric Signs - Overview of the UL 48 product safety standard and the related UL 2161 standard for neon transformers and power supplies.
Signs of the Times - Troubleshooting Neon Signs - Industry-level technical walkthrough of neon sign diagnosis, transformer testing, GTO wiring inspection, and loading requirements.
San Francisco Neon - Saving Neon: A Best Practices Guide - Authoritative preservation guide covering vintage sign repair best practices, GTO wire standards, transformer replacement, and electrode connection protocols.