How Do Neon Signs Work?
People ask me all the time what actually goes into building a custom neon sign. Not just "how does it glow" - though that's part of it - but the whole picture: the physics, the craft, the equipment, the sequence of decisions that turns a sketch into something glowing on a wall. I'm Dani Bonnet, and I bend and pump glass neon commercially out of my studio in Echo Park, Los Angeles. I've been doing this long enough that the process is second nature, but it's worth slowing down and explaining it properly, because most people have never had it laid out for them from start to finish.
So here's the real answer to how neon signs work - both the science behind the glow and the fabrication process that produces a finished sign.
The Physics: What Actually Makes Neon Glow
At its core, a neon sign is a sealed glass tube filled with a small amount of noble gas at very low pressure, with a metal electrode fused into each end. When you apply high voltage across those electrodes - typically anywhere from 2,000 to 15,000 volts, depending on the tube length and gas - you create an electric field inside the tube. That field accelerates free electrons, which collide with gas atoms, knock electrons out of their orbits, and ionize the gas. As those displaced electrons recombine with ions, they release energy in the form of photons. That release of photons is the glow you see.
This process is called gas discharge, and it's the same basic physics behind fluorescent lights and plasma displays - just in a hand-bent glass tube, running at the specific pressure and voltage profile that makes the glow continuous and stable rather than flickering or arcing.
The color of that glow depends on which gas is inside the tube and what's on the inside surface of the glass. Pure neon gas produces the classic warm red-orange. Argon gas combined with a small amount of mercury vapor produces blue-violet light, and the mercury also generates ultraviolet output that can excite a phosphor coating on the interior of the glass - which is how you get greens, whites, pinks, yellows, and the full range of colors you see in commercial neon work. So when someone asks why neon signs come in so many colors, the short answer is: different gases, different phosphors, and sometimes colored glass tubing layered on top of that.
A Brief History Worth Knowing
The physics of gas discharge was understood in the late 1800s, but the practical application to signage came from French engineer Georges Claude, who demonstrated neon lighting publicly at the Paris Motor Show in 1910 and sold the first commercial neon sign to a Paris barber shop in 1912. The technology reached the United States in 1923, when Earle C. Anthony imported two neon "Packard" signs to Los Angeles - which means neon signs and Los Angeles have been linked from almost the very beginning. That history isn't lost on me when I'm bending tubes in Echo Park.
The Six Stages of Making a Glass Neon Sign
This is where the craft lives. The physics is elegant, but a finished sign is the product of six distinct stages, each of which requires specific equipment and a specific skill set. I'll walk through each one.
1. Concept and Client Brief
Everything starts with understanding what the sign needs to do. Is it going on a restaurant wall, a retail storefront, a film set, or a private residence? What are the size constraints? Does it need to be readable from 30 feet away or is it a close-up art piece? My job at this stage is to ask the right questions and translate the answers into a fabrication-ready brief - because decisions made here cascade through every stage that follows. A sign that's too small for its intended viewing distance is a failure of the concept stage, not the glass-bending stage.
2. Design and Pattern Making
Once the concept is locked, I move into an actual design. For lettering, I work from a vector file that I can scale precisely. For custom shapes, I draw the pattern full-size on a flat surface - this is called the pattern or cartoon, and it's what I'll physically bend the glass against. The pattern has to account for the radius limits of the glass (you can't bend a tight corner without the tube collapsing), the placement of electrode ends, and where the tube sections will connect. A complex sign might have eight or ten separate tube sections, and the pattern has to make all of them work together visually when they're lit.
3. Glass Bending
This is the stage most people picture when they think about neon fabrication, and it's the one that takes the longest to learn. I heat glass tubing - typically soft lead glass in diameters ranging from 8 to 15 mm, depending on the application - over a ribbon burner until the section I'm working on becomes pliable. Then I bend it by hand against the pattern, using my breath to maintain the tube's round cross-section while it's soft (a skill that takes years to do reliably at a professional level). If you don't blow into the tube while bending, the heat collapses the interior and you lose the tube's ability to carry gas uniformly.
Tight curves, sharp angles, and long sweeping arcs each require a different technique and a different burner setup. A crossfire burner handles tight bends; a ribbon burner handles longer, gradual curves. Mistakes at this stage mean starting that section over - you can't un-bend glass.
4. Electrode Attachment and Tube Preparation
Once the glass is bent to shape, I attach electrodes to both ends of each tube section. The electrode is a small metal shell - usually iron - fused into the end of the glass. This is the point where electricity will enter and exit the tube, so the glass-to-metal seal has to be airtight. A bad electrode seal means the tube won't hold vacuum and won't light properly.
After the electrodes are attached, the tube goes through a process called bombardment. I connect the tube to a bombarder - a high-voltage, high-current device - which heats the inside of the tube to drive out any residual moisture, oils, and contaminants from the glass-bending process. If you skip bombardment or rush it, those impurities will contaminate the gas fill and shorten the sign's life significantly.
5. Pumping: Vacuum and Gas Fill
After bombardment, the tube is evacuated - I pull a vacuum to remove all the air inside. Then I introduce the gas. For a red-orange sign, that's pure neon. For blues, whites, greens, or other colors, that's argon with a small amount of mercury, sometimes with a phosphor-coated tube. The gas is introduced at a carefully controlled low pressure - too high and the tube won't strike properly; too low and it burns too bright and shortens the electrode life.
This stage is called pumping, and it's where the sign either works or doesn't. A properly pumped tube will strike immediately when voltage is applied and settle into a stable, even glow within a few minutes of warm-up. An improperly pumped tube will flicker, show uneven brightness, or fail to strike at all.
6. Aging, Wiring, and Installation
The final stage is aging the sign - running it at slightly elevated voltage for a period to stabilize the gas and burn in the electrodes. After aging, I wire the tube sections to the transformer, route the GTO high-voltage wire (the insulated lead wire rated for neon applications), and mount everything to the backing. For commercial installations, the transformer is usually hidden behind the sign face or in a remote enclosure. For art pieces, sometimes the transformer is part of the aesthetic.
The transformer is what converts standard 120V mains power to the 2,000–15,000 volts the tube needs. Matching the transformer to the tube length and gas type is critical - an undersized transformer produces a dim, unstable sign; an oversized one shortens electrode life. Getting the spec right is not optional.
Why Glass Neon Looks Different From LED Neon
I get asked this constantly, and the honest answer is that they're fundamentally different light sources producing fundamentally different visual effects. Glass neon produces an omnidirectional glow - the light comes from the gas inside the tube, radiating in all directions, which gives it that soft halo and depth. LED neon flex is a strip of LEDs inside a silicone sleeve, which produces a directional, surface-level glow. From the front, a good LED neon product can approximate the look. From the side, from an angle, or in a photograph, the difference is immediately apparent.
There's also the question of longevity and repairability. A glass neon sign built properly will run for 10–15 years before the gas starts to degrade. Individual tube sections can be replaced without replacing the whole sign. LED neon flex has a shorter lifespan and typically can't be repaired - when it fails, you replace the whole section or the whole sign.
Neither is universally better. For applications where breakage risk is high, where the sign will be handled frequently, or where budget is the primary constraint, LED neon is often the right call. For permanent commercial installations, film and TV work where the camera needs to see real depth and glow, or for fine art pieces where the object itself is the point - glass is the right material.
What Makes a Neon Sign Last
Longevity in a glass neon sign comes down to three things: the quality of the glass bending, the quality of the pumping, and the quality of the transformer match. A sign that was bent cleanly, pumped correctly, and powered by a properly rated transformer will run reliably for years with essentially no maintenance. A sign with a rushed bombardment, a marginal electrode seal, or an undersized transformer will start showing problems within months - flickering, uneven brightness, sections that won't strike.
This is why the fabricator matters. The physics of neon is well understood and hasn't changed in a century. What varies enormously is the execution.
Teaching the Next Generation: My Segment on Mission Unstoppable
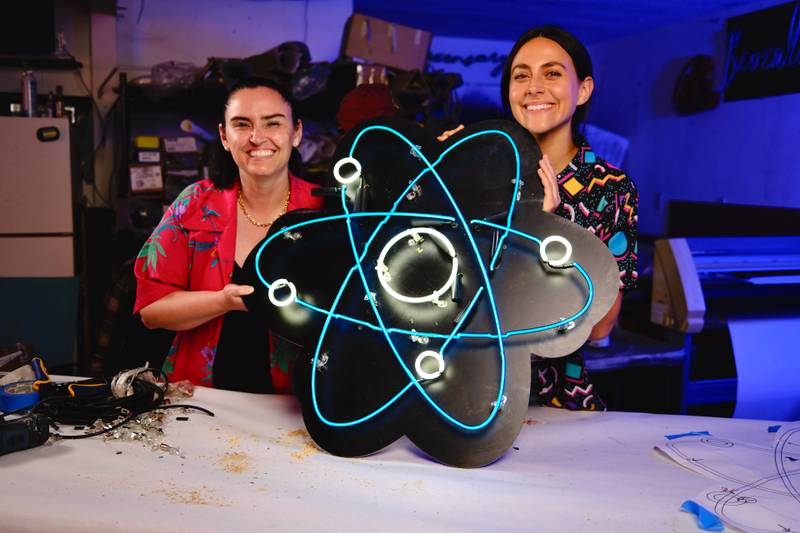
Mission Unstoppable with Miranda Cosgrove, Season 7, Episode 27 - titled "Designing Neon, Digging Up Fossils, and Defending Your Brain" - aired on CBS on August 1, 2026, and featured me, Dani Bonnet, as the neon sign expert and fabricator demonstrating the chemistry and craft of glass neon sign-making.
Episode Details
Show: Mission Unstoppable with Miranda Cosgrove Network: CBS Season: 7 Episode: 27 (S7 E27) Air Date: August 1, 2026 Episode Title: "Designing Neon, Digging Up Fossils, and Defending Your Brain" Segment Title: "Chemistry in Neon Signs" Dani's Role: Featured expert and neon sign fabricator Studio Location Featured: Neon Flamingo, Echo Park, Los Angeles, CA
I went into it wanting to make sure the audience walked away understanding that neon isn't magic - it's chemistry and physics and a craft that takes real training to execute. The show reaches a young audience, a lot of them girls who are just starting to figure out what STEM can look like in practice. I wanted them to see that you can work with your hands, understand the science behind what you're doing, and build something that's genuinely beautiful. Those things aren't in conflict. The segment was filmed on location at the Neon Flamingo studio in Echo Park, Los Angeles, where I bend and pump glass neon commercially - the same space where every sign in my portfolio was made.
Frequently Asked Questions About How Neon Signs Work
What gas is used in neon signs? Classic neon signs use pure neon gas, which produces a red-orange glow. Most other colors use argon gas combined with a small amount of mercury vapor. The argon-mercury combination produces blue light and ultraviolet output, which excites phosphor coatings inside the tube to create greens, whites, pinks, yellows, and other colors. So when someone says "neon sign," they usually mean a glass gas-discharge sign - but the gas inside is often argon, not neon.
How does electricity make neon glow? High voltage applied across the electrodes at each end of the tube creates an electric field that ionizes the gas inside. Electrons are stripped from gas atoms, and as they recombine, they release energy as visible light - photons. The specific wavelengths of light (and therefore the color) depend on which gas is being ionized.
How long do neon signs last? A properly built glass neon sign will typically last 10–15 years before the gas begins to degrade noticeably. Electrode life is usually the limiting factor. Individual tube sections can be re-pumped or replaced, which means a well-built sign can be maintained indefinitely rather than replaced outright.
What voltage do neon signs run on? Neon signs run on high voltage - typically 2,000 to 15,000 volts - supplied by a dedicated neon sign transformer that steps up standard 120V mains power. The exact voltage depends on the tube length, gas type, and transformer rating. The high-voltage side of a neon circuit is not something to interact with without specific training.
What is the difference between neon and LED neon signs? Glass neon signs produce light through gas discharge inside a hand-bent glass tube. LED neon signs use LED strips inside a flexible silicone sleeve to approximate the look. Glass neon has an omnidirectional glow, greater visual depth, and longer lifespan when properly built. LED neon is more durable (no glass), lower voltage, and less expensive. They are different products with different appropriate applications.
Can neon signs be repaired? Yes - this is one of the practical advantages of glass neon over LED neon. Individual tube sections can be re-pumped if the gas degrades, or replaced if the glass is damaged. Transformers can be swapped out independently. A glass neon sign from a professional fabricator is a repairable object, not a disposable one.